Showing posts with label Christmas. Show all posts

Friday, July 10, 2026

Christmas in July Challenge!

 Happy Friday friends! 

Tasha here sharing a card inspired by the current Art Impressions Christmas in July Challenge.

I love making holiday cards and finding ways to use my everyday stamp sets for Christmas. For this card, I used the piggy from the 5180-Barnyard Animal Cubbies stamp set from Art Impressions and added a little Santa hat to make him holiday ready.

For the background scene, I used a stamp from the retired Sleigh Ride Circlet MTF set. I love the little wreath on the tree and the falling snow. It makes such a sweet winter scene.

I finished the card with pattern paper from the 6143-Woodland Christmas Paper Pack, layered it with red, gray, and white cardstock, and added a simple "Peace, Love & Joy" sentiment.

Thanks so much for stopping by today! I hope this card inspires you to give your non-holiday stamps a festive twist and join the Christmas in July Challenge. 


Friday, December 12, 2025

Holiday Cheer with a Tiny Deer!

Hi everyone and welcome back to my blog!

Tasha here sharing a holiday card created with the new 6104-Christmas Keepsake Set from Art Impressions.

This sweet little reindeer stamp is just too cute and he looks adorable against the falling snow pattern paper. To build the scene, I added a white snowy ground and placed a gift and tree in the center of the card before framing everything with a metallic gold frame. The dark blue snowy sky and golden color pair beautifully with the pops of green and red.

To finish the design, I added a holiday plaid pattern paper with red and white card stock layers. A simple greeting completes the card and ties the whole look together. 

I hope you enjoyed today's card and are having a wonderful day!


Friday, December 5, 2025

Christmas in the Woods!

Happy Friday friends!
Tasha here sharing a Holiday card created with the new 6085-Woodland Snowman Scene stamp set from Art Impressions. Now that we’re officially in December, it’s the perfect time to finish (or start!) those holiday cards and projects, and this sweet snowman scene is wonderful for sending warm Christmas wishes to someone special.
To build my scene, I stamped the snowman and added a cluster of pine trees behind him to give the design a cozy woodland feel. I used Bleed Proof White to paint snowy highlights on the trees, add texture to the ground, and create soft falling snowflakes; this little detail really brings the winter magic to life.


For the sentiment, I stamped “Merry Christmas” in bright red ink on a crisp white banner and attached it to layers of Green, Red, and White cardstock. A festive plaid patterned paper ties everything together and adds that classic holiday charm.

I hope this card inspires you to get creative and enjoy a little crafty time this season! 


Friday, August 8, 2025

Warm Winter Wishes!

 Happy Friday friends!

Tasha here sharing a card inspired by the current Art Impressions Stitches & Scallops Challenge. For this project, I used the super cute 5802 – Joyful Snowman Set and 6047 – Scalloped Square Dies to create a cheerful winter scene. It’s never too early to get a head start on holiday cards!

I stamped the snowman with black ink and colored him with Copic markers. To give his winter accessories extra personality, I used a black liner pen to draw a knitted pattern; little custom touches like this are some of my favorite ways to add detail. I even added a tiny heart to his pocket for an extra sweet look. After that, I cut him out with the coordinating die and popped him up with foam tape for dimension.

For the background, I created a snowy hill and paired it with Art Impressions snowflake pattern paper for the sky. To match the challenge theme, I added scalloped frames in two sizes; one with a slightly different scalloped edge, which adds great visual interest.

The card base features layers of blue, white, and gray cardstock, along with a piece of blue plaid pattern paper that ties in perfectly with the colors on the snowman. To finish it off, I used a white gel pen to add extra snowflakes directly onto the snowman for that frosty, wintery feel.

Thanks for stopping by, and I hope you’ll join us in the challenge!


Friday, December 13, 2024

Warm Christmas Wishes!

Happy Friday!

Tasha here sharing a holiday themed MB card inspired by the current Art Impressions Teeny Tiny Challenge. To create my card I used the 5442 MB Santa Christmas Set, 5324 MB Cat Accessories, and the 5322 MB Den Set from Art Impressions. This little scene looks so peaceful and perfect for the upcoming Christmas holiday! 

I started by making the MB card base with holiday cat-themed pattern paper and stamped out all the little pieces. Also, each of the MB sets include the coordinating dies making it super easy to cut all the tiny images out. 


After looking at the fireplace and Christmas tree, I thought it would be cute to have a little kitty sleeping by the warm fire. The 5324 MB Cat Accessories has several cats to choose from and this one fits perfectly on the chair from the 5322 MB Den Set. It's awesome that you can mix and match your MB sets to make customized projects!

Lastly, I added little cat-themed details to go with the design. I drew in paw prints on the gifts, and added a little paw print on the letter to Santa. I'm sure this sweet little kitty is going to have a wonderful Christmas!

I hope you enjoyed today's card and will join in the Teeny Tiny challenge!


Friday, December 6, 2024

Snowy Greetings - Dare 2B Artzy IG Hop

Hi everyone and welcome back to my Blog!
This weekend Dare 2B Artzy is having a fun Instagram Hop and the design team will all be sharing holiday inspiration projects. My project is a fun gift card holder that features the ice skate from the D2BA Winter Wonderland Stamp Set.


To go with the ice skating/winter theme, I used light blue colors and a piece of snowflake pattern paper. I love how these colors give an icy look to the project! I also attached several white enamel dots to the center of several snowflakes to add in a little more detail to the front.

The inside of the holder has four (4) pockets and I decided to add in to purple pockets for an extra pop of color. You can actual fit at least six (6) pockets in this holder (maybe more), but this was the perfect amount for me. Red and Green pockets would also be fun for a Christmas design or pattern paper would also give a fun look to the inside.


Lastly, I attached the sentiment and a small velcro dot to close the holder. I also add extra glue behind the velcro to make sure it stays in place.

Thank you for checking out today's project and I hope you will check out the Dare 2B Artzy Instagram Hop. (Click Here)


Have a great day!

_______________Gift Card Holder Instructions_______________


Step 1: Cut a piece of card stock to 3" x 11" (Heavy Weight cardstock)


Step 2: Score the base at 8-1/2", 7-3/4", 4", and 3-1/4". 


Step 3: Use bone folder to crease all the score lines.


Note: The shorter section is the top of the holder.


Step 3: Create your pockets (I used four (4) for this project).

Cut a piece of card stock to 6” x 4”


Step 4: Score the card pockets at 3-1/4” and 1/2"


Step 5: Turn the paper and score down at 1/2"


Step 6: Cut each pocket as shown below:


Step 7: Use a bone folder to crease all the score lines.


Step 8: Add liquid adhesive to both tabs to create the pocket.


Step 8: After you assemble the pockets, use a small circle die or punch to cut the same size hole each pocket as shown below. This makes it super easy to pull the pockets.


Step 9: Use liquid adhesive to attach the pockets to each other. 


Start by glueing the first pocket to the inside center of the card base (do not go over the score lines) and stack the remaining pockets on top of each other.


*Reminder: The shorter folded side is the top of the holder.


Optional: For the final pocket, pull up the bottom of the holder and attach it to the top pocket. This will allow the pockets to pull open when you open the holder. 


Step 10: To complete the project, attach a small Velcro dot to keep the holder closed. 


Step 11: Decorate with pattern paper and enjoy! 


Joyful Snowman Card!

 Happy Friday!
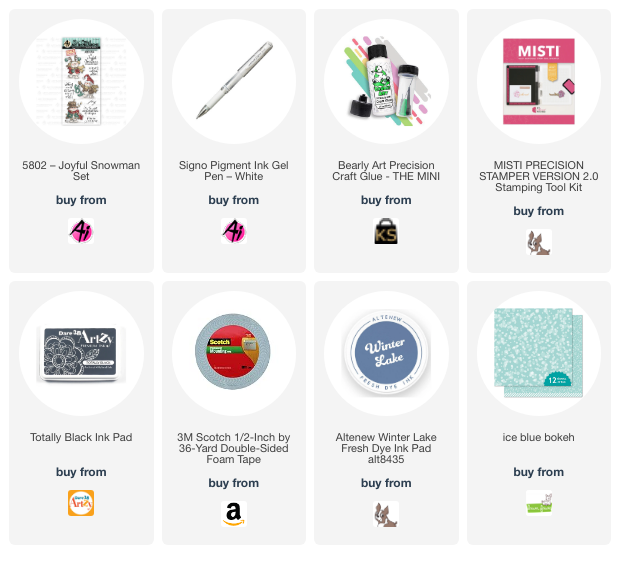
Tasha here sharing a Christmas card featuring the 5802 - Joyful Snowman Set from Art Impressions. This set has the cutest little snowmen stamps and several greetings for holiday cards and projects. I think this snowman would also look great on gift tags.

To begin, I stamped the snowman and used the included dies to cut the image out. For the coloring, I used  teal, purple, and blue Copic Markers and added a light pink for his cheeks. I also used a white gel pen to create a design on the hat and scarf, I love coloring clothing!

To make the background, I added a pattern paper for the sky and cut a hill out of white paper to look like snow. I also attached several small white enamel dots to go with the snowy sky. 

After I completed the background, I attached a metallic teal frame and stamped a sentiment with teal ink. I think this sentiment goes perfectly with the joyful snowman and I like how it looks with the silver glitter frame.

Lastly, I added layers of plaid paper, dark teal card stock, and silver glitter paper. All of these colors look so pretty together and in person the glitter is so sparkly. Teal and silver colors always look awesome on winter cards and it's one of my favorite color combinations.


I hope you enjoyed today's card and are having a wonderful day!


Friday, November 15, 2024

Winter Wonderland Shaker Card!

 Happy Friday friends! 

Tasha here sharing a card inspired by the current Art Impressions "Under the Dome" Challenge. This challenge is all about shaker cards and I thought is was a great time to make a Christmas shaker card.

My project features one of the penguins from the new 5929-Christmas Train Set. This set has several cute penguin stamps to choose from and this little guy was the perfect size to fit inside the plastic dome. I also created a little snowy background before adding the winter themed sequins; these colors are so pretty!


After my shaker was completed, I added a sparkly silver glitter layer, a scalloped red frame, and layers of black card stock, silver glitter paper, and a candy cane pattern paper. I also attached a snowflake pattern paper from the 5963-Winter Woodland Paper Pack to coordinate with the scene.

Lastly, I added a simple "Winter Wonderland" greeting before adhering the card to a white card base.

Thank you for checking out today's card and I hope you will join in this fun challenge!


Friday, October 18, 2024

Hedgehog Holiday Card!

 Happy Friday Friends!

Tasha here sharing a new holiday card inspired by the current Art Impressions Tres Chic Challenge. I was inspired by the brown tones and buffalo check print in the challenge photo and thought this color combination would be perfect for a holiday card.

The sweet little hedgehog image is from the new 5953-Woodland Critters Set. I love animal stamps and this one is adorable with his little scarf and tree. I colored him with markers and used the included die set to cut the stamped image out. For the scarf, I used a white gel pen to add a knit-like detail.

To create the background, I attached several glittery snowflakes and used the same glitter paper for the ground. The sparkle is so pretty and these falling snowflakes are a great size for cards. I also thought mixing up the sizes and having some outside of the frame gave the card more interest.

Lastly, I embossed "Merry Christmas" on to black paper and attached layers of brown, red, and black card stock. I also added a piece of buffalo check pattern paper to bring in the colors/patterns from the challenge inspiration photo. I love how this turned out!

Thank you for checking out today's card and I hope you will join in the challenge!
Have a wonderful day!


Friday, December 1, 2023

Merry Christmas Snowman Card!

Hi everyone!
Happy Friday and Happy December! Tasha here, sharing a little holiday cheer with you all. Today's blog post is all about spreading joy with the oh-so-adorable 5802 - Joyful Snowman Set. Now that we are in the month of December, I am actively working on Christmas projects and this little snowman is perfect for cards and gift tags!
I started by stamping our the image with some bold black ink, and then the real fun began - coloring! Copic Markers came to the rescue, bringing this snowman to life with pastel hues. But wait, there's more! A white gel pen worked its magic, adding a cozy knit-inspired pattern to the scarf and mittens. I love the pink & white color combination!

And let's not forget those antlers! Adorned with the cutest ornaments, they take the festive factor to a whole new level.


Lastly, I stamped "Merry Christmas" and added layers of pattern paper to complete the festive design. This card is so cheerful and I look forward to sending it to someone special this holiday season!

Have a great weekend!